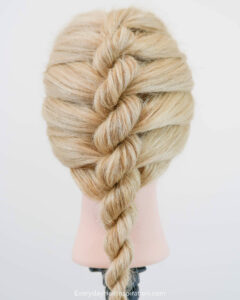
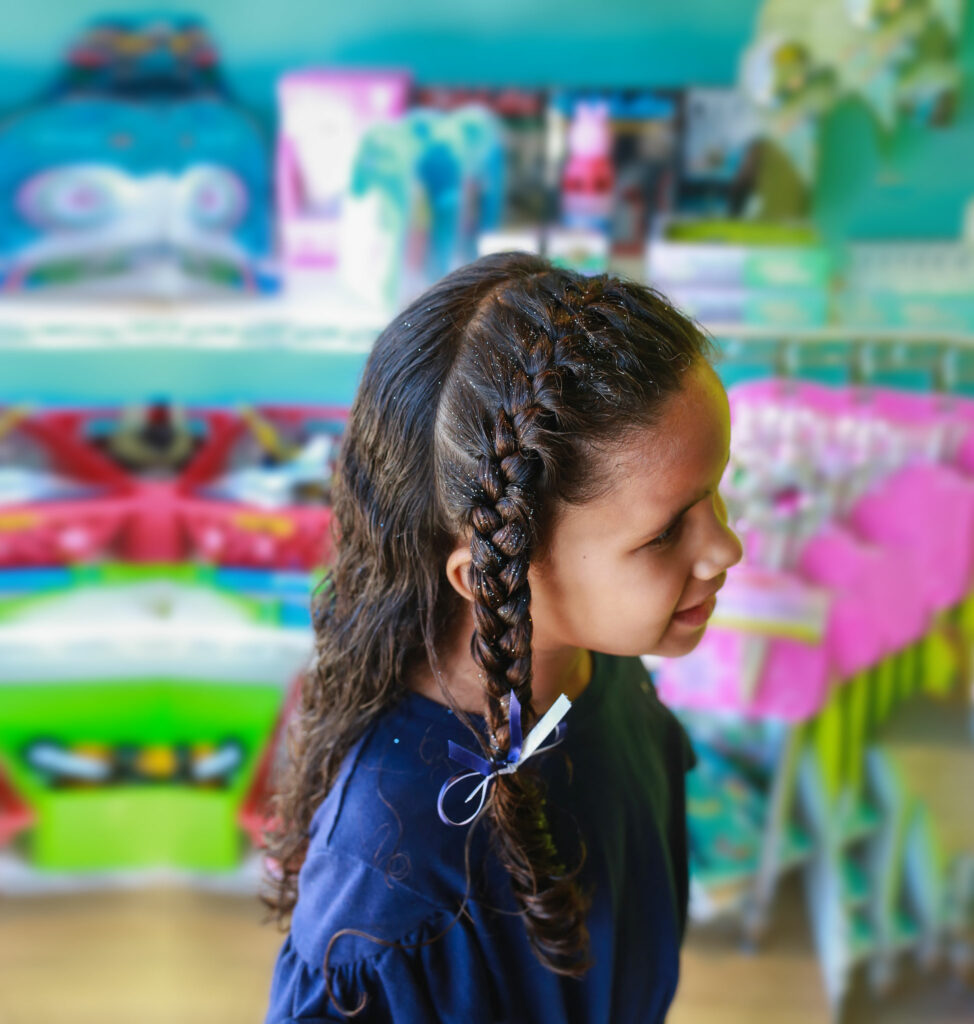
This elegant two-strand braid looks a lot more complicated than it actually is, and results in some fabulous heatless curls once you take them out! Here’s how you can achieve the look at home:
What you’ll need:
A hairbrush
Hair elastics
Hairspray (optional)
Instructions:
Start by brushing out your child’s hair. You want their hair to be tangle-free!
Part your kid’s hair into two sections. Tie one section off so it is out of the way.
Starting at the top of your first side, take a small section, and twist it in towards your child’s face.
Take another small section and twist it in the same direction as the first section.
Wrap both the second section around the first, away from your little one’s face. Twisting the sections together the opposite way they are twisted individually is what locks the braid in place.
Add more hair into your first section, twist the whole section towards your kid’s face, then wrap it around your other section away from your little one’s face.
Repeat steps 5 and 6 until you reach your desired length.
Secure your first braid with an elastic, then repeat on the other side.
Congrats! You’ve finished your set of French Rope Braids!
Tips and Tricks
To simplify the style, start with a ponytail. Split the ponytail into two sections, then twist each of those sections to the left. Wrap both sections around each other to the left. This makes a cute ponytail braid!
For overnight heatless curls, lightly spray your little one’s hair with some water to make it wet before braiding! (A continuous misting bottle makes this super easy- you can pick one up at Pigtails & Crewcuts West Cobb!) When they wake up, they’ll have the most precious waves with no heat damage!
To prevent flyaways and keep the style sleek, try a braiding balm or hair gel!
Now you know the ins and outs about how to do a french rope braid!
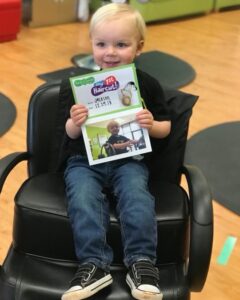
At Pigtails & Crewcuts, we offer more than just fantastic haircuts— we also provide quick and easy ear-piercing services for children of all ages! Getting their ears pierced for the first time is a huge milestone for little ones, and even though it’s an exciting experience, it can also be a little scary. That’s why we have a kid-friendly environment and patient staff to put you and your child at ease.
Before the Piercing
Upon arrival, we’ll have you and your child look through our different earring options to pick the earrings that suit your needs best! We offer over 35 different stud designs with stainless-steel or gold-plated finishes. Once you’ve selected your earrings, your kid will take a seat while one of our piercing specialists explains the process of what’s going to happen and how to take care of their new piercings while they heal. In the meantime, we’ll have a couple of consent forms for you to fill out. Don’t worry; you’re not missing anything! We’ll send you home with a sheet with all the aftercare instructions.
Next Steps
After explaining to your little one how our process works and how to care for their piercings, we’ll put on a fresh pair of gloves and disinfect their ears. Then, we’ll carefully mark the center of each ear lobe, explaining to your child exactly what we’re doing while we’re doing it and providing any reassurance they may need. Once we’ve planned where we’re going to pierce, we’ll ask you for parental approval. If you’re not happy with the placement, no worries! We’re more than happy to remark your kiddo’s ear until you approve.
Time to Pierce!
Finally, it’s time to pierce! Your piercing specialist will call over another trained staff member to assist with the job. First, we’ll measure. Then, when everybody is ready, we’ll count to 3 and pierce both ears at the same time!
At the front desk, we’ll give you a goodie bag with aftercare instructions, cleaning solution, and a special ear piercing certificate! Your little one is also welcome to a lollipop and a treasure from our treasure chest.
We are so glad you chose us for your special day! We hope to make it a super positive memory!
Haircuts can be hard on kids and parents that’s why at Pigtails & Crewcuts, we have tricks up our sleeves to offer drama-free haircuts for little ones! We try to ensure that even the most difficult moments of every haircut go smoothly. Here’s what you can do before you arrive to your appointment to make things a little easier for everybody:
1. Get your little one used to the sound of buzzing close to their head.
If your little one will need a clipper-cut, try to familiarize them with the buzzing sound. Loud noises scare young kids, and we get that! Children do better with familiar sounds, so something as simple as playing the clipper sound on a video from your phone may make your little one feel more comfortable. You could even give them a pretend haircut with your phone while playing the sound!
2. Bring your kid to the salon before their appointment.
Bringing your child to the salon gives them an opportunity to look around and become familiar with the salon environment. Pigtails & Crewcuts is kid-friendly, and seeing other kids getting their hair cut and being just fine can reinforce the idea that your little one will be safe and unharmed.
3. Make sure your little one is well-rested.
If your child still takes naps, plan to come in after their nap, so your little one is happy and ready to play!
4. Bring something that provides comfort.
Your child is more than welcome to hold onto one of the toys from our playroom while they get their hair cut, but sometimes there’s one special toy from home that they love to play with that can provide a distraction and comfort. Don’t worry if your little one moves around while they’re playing- wiggles are welcome in our salon!
5. Bring their favorite snack.
Food can often provide comfort to our bodies because our brains think that we wouldn’t be eating if we were not safe. We have animal crackers and lollipops in the salon, but if your little one has allergies or a loved snack that usually calms them down, it may be best to bring that in for them to enjoy while they get their hair cut.
6. Use the word "trim" instead of "haircut".
The word “cut” can have a negative connotation- it can make your little one think that they will be cut and hurt, even though that’s not the case! Saying “trim” instead has a more positive meaning and may be more well-received.
7. Arrive early for your appointment.
Arriving early for your appointment gives your little one time to become familiar with the salon and play in our playroom before their haircut. It also gives them more time to sit in one of our cool car-themed chairs for some time before the haircut starts!
With these tips in mind, you can easily achieve a drama-free haircut, or at least one with as few difficulties as possible! We can’t wait to see your little one’s smile after their haircut!
Want to learn some tips and tricks for promoting hair growth and avoiding hair damage? Check out this article!
With the end of the school year and the beginning of summer quickly approaching, it’s important to understand how to take care of your child’s hair before and after your trip to the pool. Here are four tips for swim season hair care!
1. Rinse hair before going swimming.
If your child’s hair is already full of water from a rinse, it will absorb less chlorinated water. This reduces the risk of damage! Hair is like a sponge – if it’s already full of water, it can’t absorb much more.
2. Use a swim cap or protective hair styles.
Tying long hair into a ponytail, braid, or tight bun minimizes contact with chlorine. It also looks super cute!
3. Use a clarifying shampoo after going swimming.
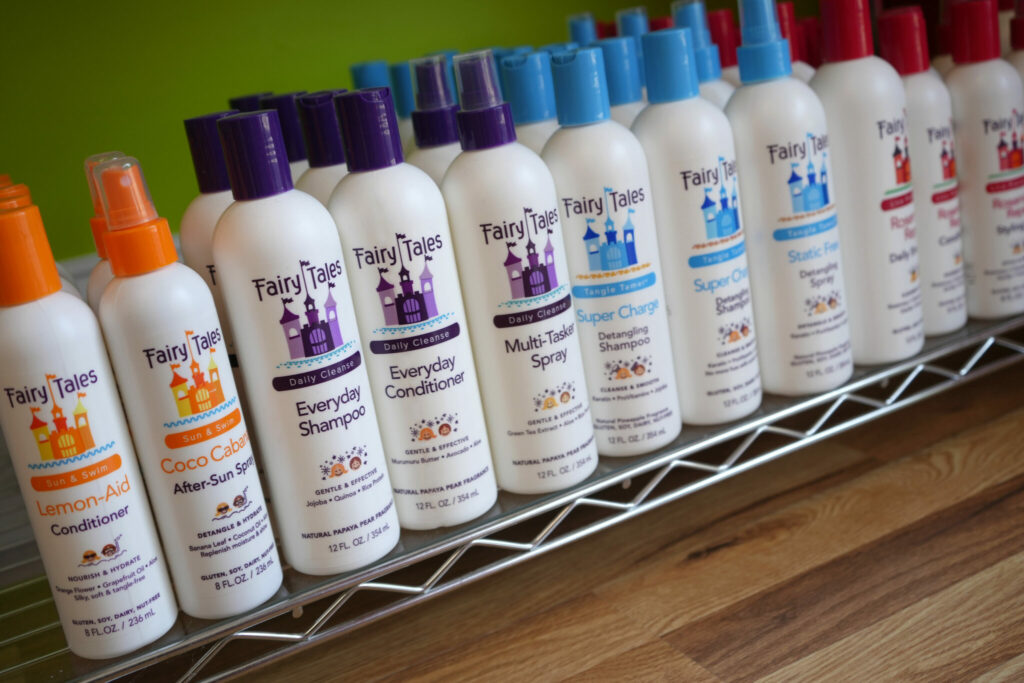
Regardless of hair type, washing chlorine out of your hair is crucial to reduce the risk of damage. A gentle, sulfate-free, clarifying shampoo is perfect for the job. We recommend Lifeguard™ by Fairy Tales. You can pick up a bottle at Pigtails & Crewcuts East Cobb today! Just make sure to note that clarifying shampoos can be hard on the hair and should not be used everyday.
The Fairy Tales Hair Care Line also has a summertime spray and conditioner that pair well with the Lifeguard Shampoo!. This line is specially made for kids and is parabean free, sulphate free, gluten free, soy free, phthalate fee. No harsh toxins!
4. Don't wait to wash your child's hair when you get home.
If you let chlorinated water sit in your little one’s hair for an extended time, it will dry out and crack their hair strands. Wash their hair thoroughly soon after returning home. Be sure to follow up with a good conditioner! We recommend Lemon-Aid™ by Fairy Tales. It’s formulated to nourish and hydrate post-swim hair.
Following these swim season hair care tips will help keep your hair happy and healthy all summer long!
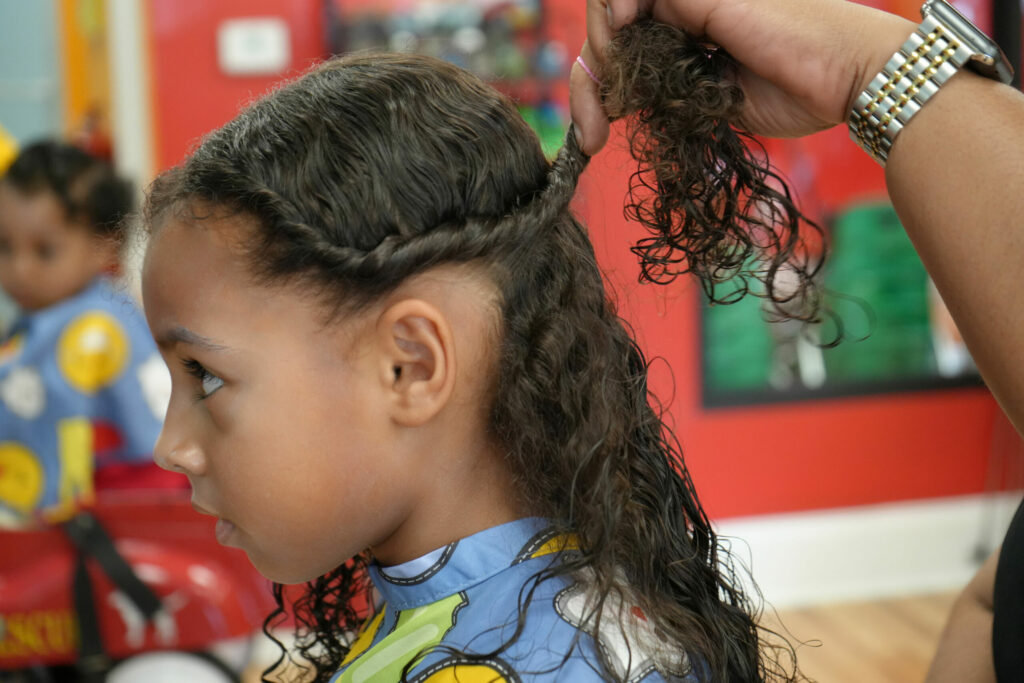
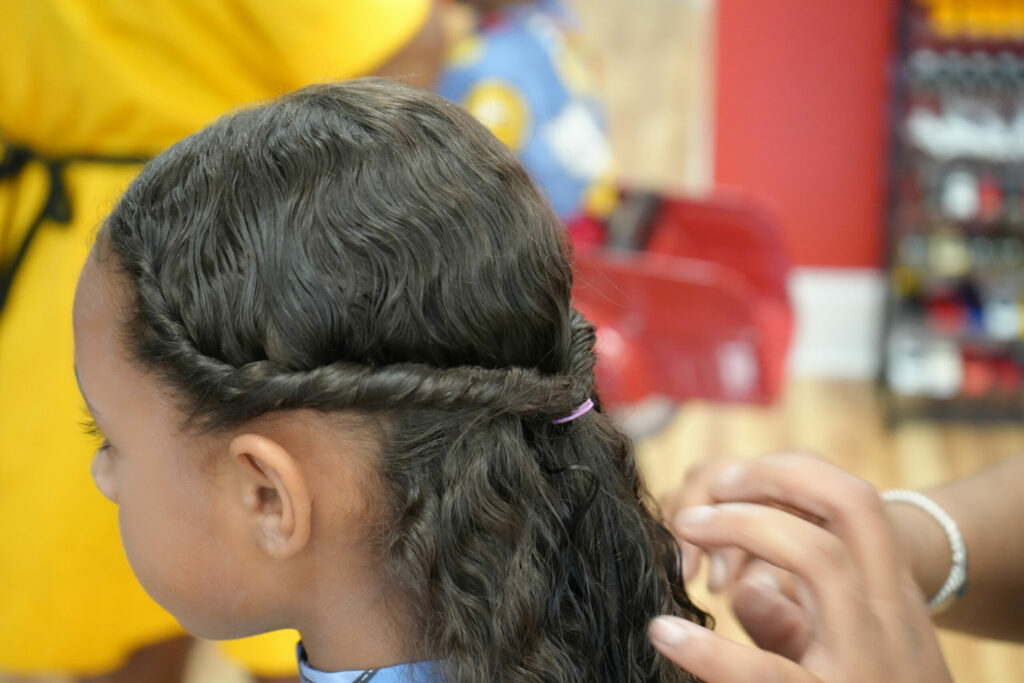
Bubble Braids are one of the newest and trendiest hairstyles for the summer, and they’re super easy to do! Here’s how you can achieve the look at home. Follow along with the video or instructions below to learn how to do bubble braids!
What you'll need:
A handful of hair elastics
A hairbrush
Hairspray (optional)
How to do Bubble Braids - Instructions
Start with dry, tangle-free hair. Clean hair is good, but hair that’s a day or two post-wash will hold the style better.
Part the hair in the middle, dividing it into two equal sections. Tie one section off.
Starting at the top of your child’s head, gather a small section of hair, and tie off about an inch or two down from the top of the section. We recommend taking diagonal sections, as the finished result will look neater.
About an inch or two down from your first elastic, add in another section of hair. Secure this section with an elastic. Repeat this process until you reach the end of the hair.
Starting from the first section, work your way down, using both hands to pull the hair apart. This is what creates the bubble effect.
Repeat on the other side of your little one’s hair.
You’re all done. Congrats!
Extra Info
Tips and Tricks
Use a hair balm or light gel to prevent or tame flyaways.
These instructions are for bubble hair braids, but you can simplify the style. Just start with two pigtails and add elastics every inch. The style just won’t be as close to their head.
Add some pizzazz!
Use colored elastics to add some fun! You could do a rainbow, fun colors, or elastics that match your little one’s outfit!
Use hair gems to add some sparkle! You can pick up peel & stick gems by the front desk at Pigtails & Crewcuts East Cobb.
Add some shimmer and shine with glitter. Glitter can be messy, but not with Galexie Glister luxury glitter gel! The product is mess-free and cosmetic grade, so it can be safely used on your child’s hair, face, and body. Pick up a jar at Pigtails & Crewcuts East Cobb.
Even if you follow aftercare instructions perfectly, new piercings can still get infected. Fortunately, they aren’t too tricky to care for, and you probably have everything you need at home! Here’s how to care for an infected ear piercing.
What You’ll Need:
Warm water
Hand soap
Salt
Cotton balls
Antibiotic ointment, such as Neosporin™
Instructions
First and foremost, do not take the earring out of the infected piercing. Doing so will make the infection worse.
Wash your hands with soap and water any time you touch the piercing.
Dissolve some salt in warm water to make a saline solution. You’ll want to go heavy on the salt.
Soak two cotton balls in the warm saline solution and hold one on either side of your little one’s piercing. Keep it there for at least 3 minutes. You can do it for longer than 3 minutes, but make sure the solution stays warm. This helps reduce swelling. You can also use the cotton ball to gently clean the area round the piercing, as the piercing may have released some fluid while fighting the infection.
Apply an antibiotic ointment to the piercing.
Repeat these steps twice a day for at least a week. If the infection persists or worsens, please take your child to the doctor and follow their instructions.
Tips for avoiding Ear Piercing Infections
Some people are more prone to infections than others, but there are some precautions you can take to protect your little one’s new piercings.
Follow the aftecare instructions that your piercer gave you.
Style your child’s hair in such a way that prevents the hair from wrapping around the back of the earring, like braids or a headband.
If your child goes on a flight, clean the piercing as soon as you. can once you get off the plane. Bacteria from airplane seats can easily make their way to your child’s piercings!
Teach your child to only touch their piercing with clean hands.